Do you fly the same site frequently? If so, you can save the time spent placing out and picking up your AeroPoints each time by using AeroStencils to mark your AeroPoints positions semipermanently.
AeroStencils are lightweight, durable stencils exactly the same size as AeroPoints that fit perfectly inside an AeroPoints carry bag.
Great news: From now on, AeroPoints customers will receive two free AeroStencils with every AeroPoints purchase.
How to use AeroStencils:
1. Decide where to put AeroStencil marks
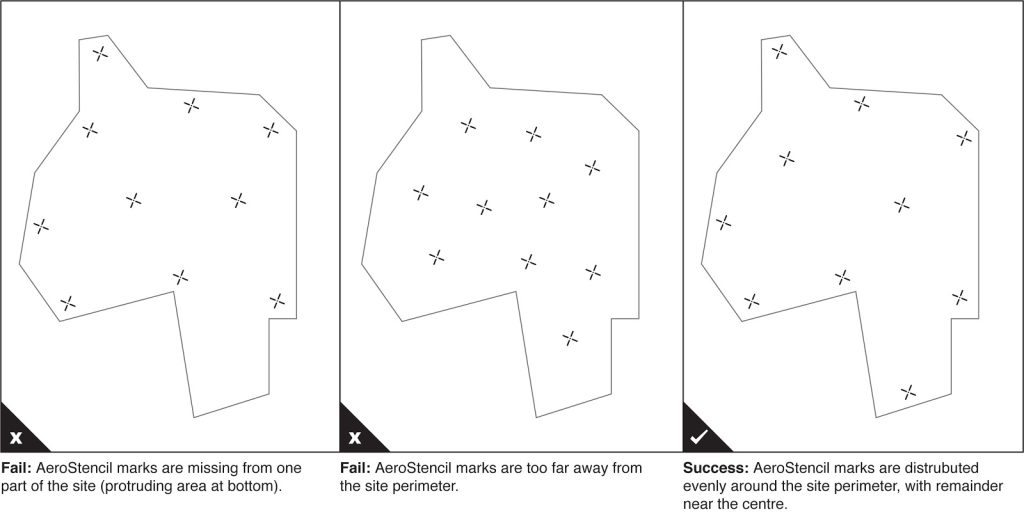
You should create at least 10 AeroStencil marks around your site, paying special attention to the perimeter. For best results, place marks near each corner and distribute the remainder around the center, aiming to cover both high and low elevations.
AeroStencil marks work best on hard, flat surfaces, where they will not be disturbed by people, animals, or vehicles (parking lots and concrete blocks are good choices). You should notify site manager/personnel that AeroPoints and/or AeroStencil marks are in use.
Avoid creating marks beneath trees, walls, buildings or power lines. AeroStencil marks should have an unobstructed view of the sky in every direction above a 15° angle.
2. Spray AeroStencil Marks
Once you’ve identified where on your site each AeroStencil mark should go, lay down your stencil in that position.
Spray your AeroStencil mark using heavy duty line-marking paint in a color that provides good visual contrast with the surrounding area (pink or yellow is generally a safe choice). When spraying your mark, remember to pay special attention to the outside corners.
Wait a moment for the paint to dry, then place your AeroPoint on top of the AeroStencil mark, using the painted outside corners to align the AeroPoint exactly. Once in position, press the button on each AeroPoint to start recording.

2) Remove AeroStencil and allow paint to dry.
3) Place AeroPoint on top of AeroStencil mark, using painted corners to align exactly.
3. Fly your drone (or just wait 90 minutes)
To accurately log your AeroStencils positions, AeroPoints should be left in place to record at least 90 minutes worth of data.
4. Upload your AeroPoints data
Once collected, AeroPoints will automatically connect to your predetermined WiFi network and begin uploading their recorded data.
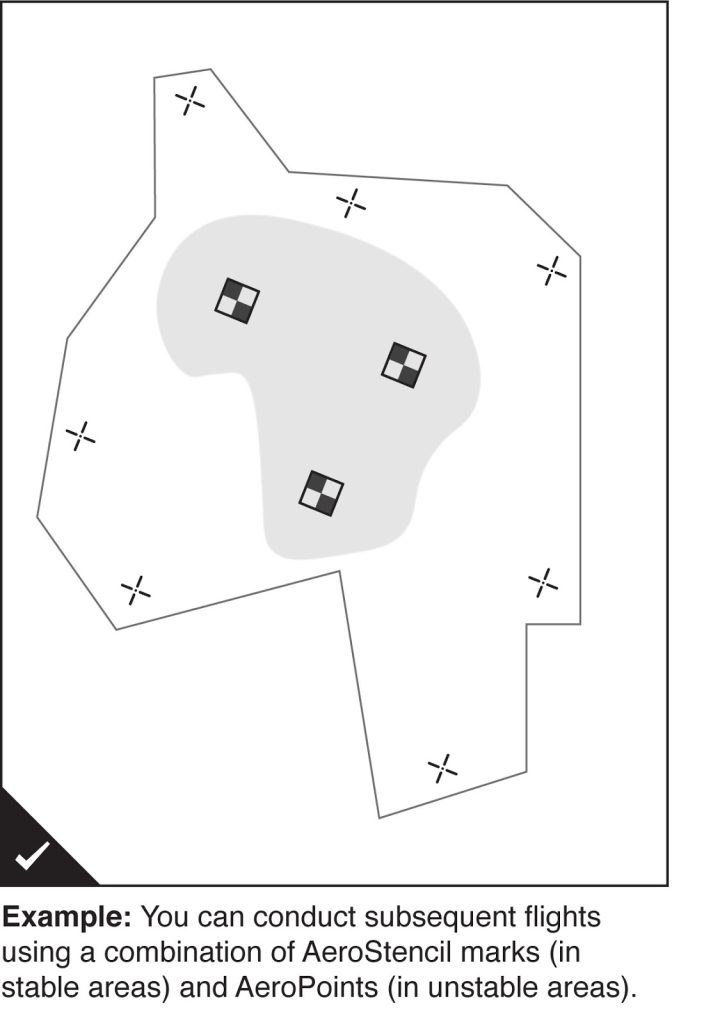
Subsequent flights
In stable areas of your site (away from earthmoving) you can use your AeroStencil marks as a substitute for laying out AeroPoints for subsequent flights. Propeller will use your existing AeroStencil marks to calibrate your data set.
Be aware though, that in areas where the earth’s surface is changing regularly (such as in the pit or on a landfill site) you should continue to rely on AeroPoints for best results. If parts of your site are unstable, we recommend using a combination of AeroStencil marks (in stable areas) and AeroPoints (in unstable areas) for subsequent flights.
You can rely on AeroStencil marks for up to three months or as long as the marks remain visible. After this interval, it’s best to rerecord the position of AeroStencil marks using AeroPoints. This will help maintain the highest levels of accuracy.